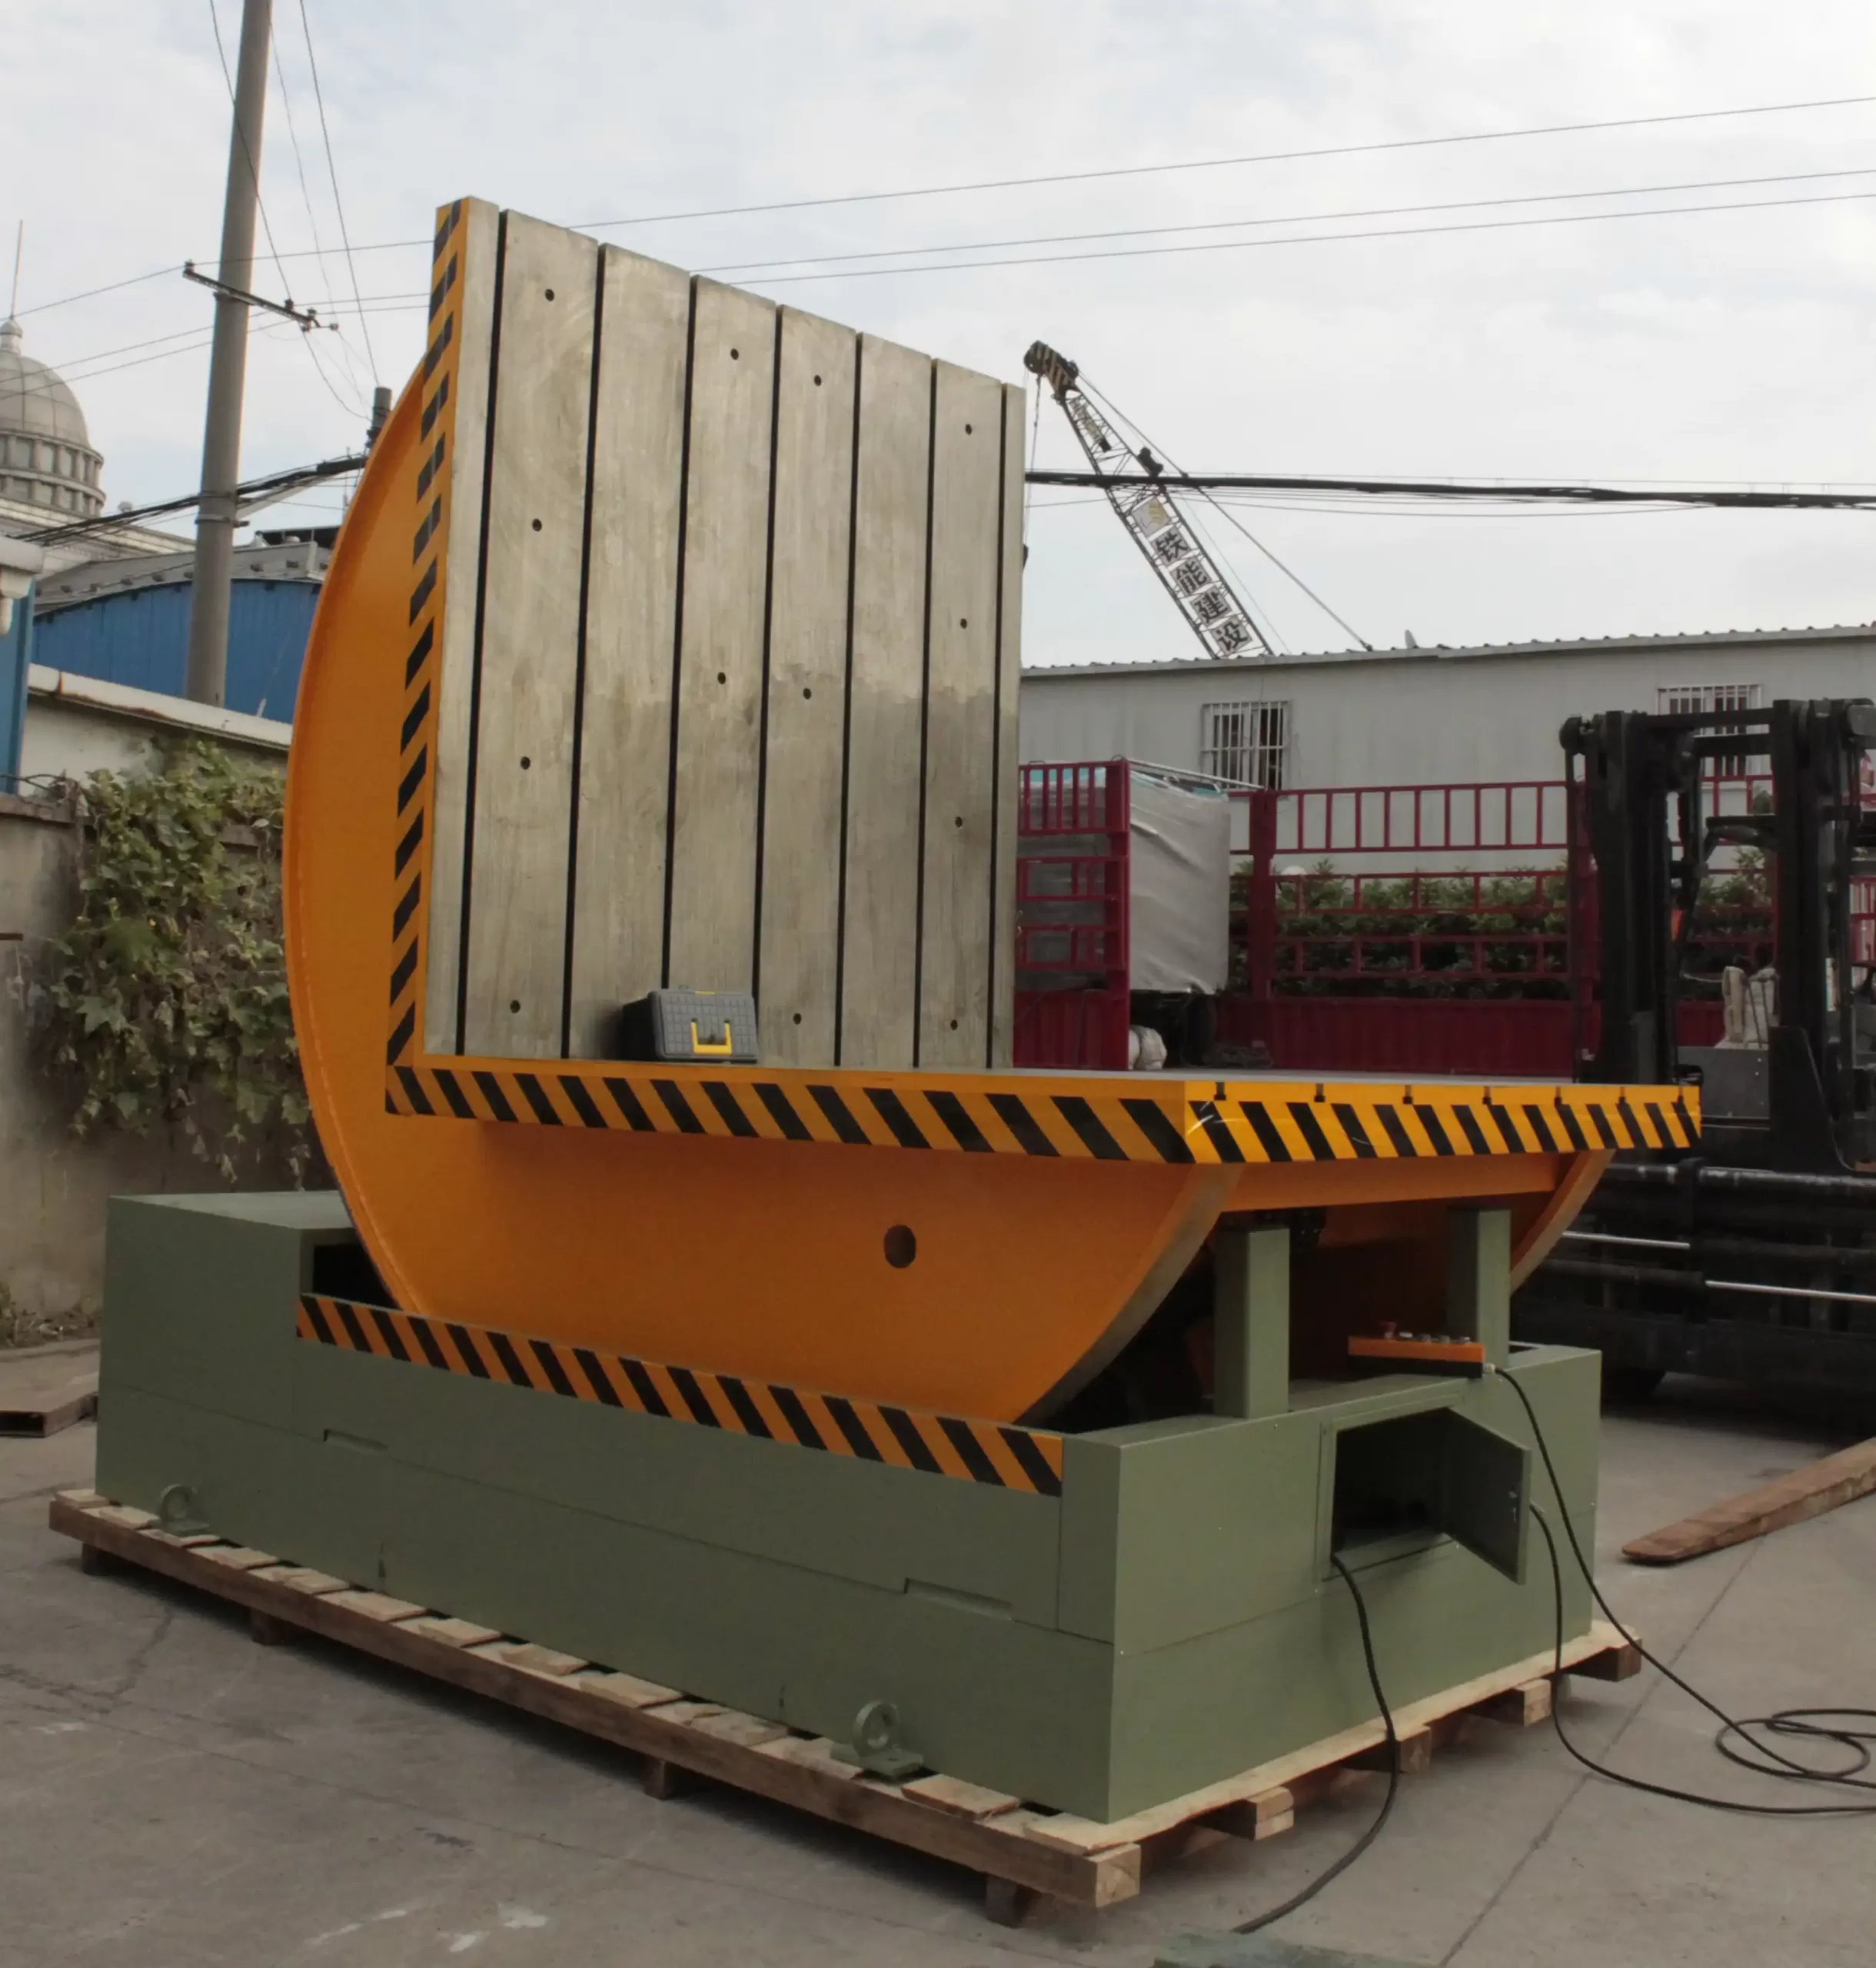
Moving heavy machinery like a mold upender is a complex undertaking. One wrong move could lead to costly damages, extensive downtime, and potential safety hazards. Ensuring a successful and efficient relocation requires careful planning, the right equipment, and experienced personnel.
Relocating a mold upender involves meticulous planning, safe equipment handling, and minimizing downtime. Best practices include thorough preparation, using appropriate lifting gear, securing the load correctly, and following a detailed, step-by-step relocation plan to ensure a safe and efficient move.
Whether you're reorganizing your warehouse, moving to a new facility, or simply need to reposition your mold upender, a well-executed relocation strategy is crucial. Let's explore the best practices that will keep your operation running smoothly.
Planning and Preparation for Mold Upender Relocation
A successful move starts long before the actual relocation. Proper planning and preparation are crucial to minimize disruptions and ensure a smooth transition.
Effective planning is the cornerstone of a successful mold upender relocation. This includes assessing the current and future locations, creating a detailed moving plan, and ensuring all necessary tools and personnel are available. Neglecting this stage can lead to significant delays and increased risks.
Consider these essential steps:
-
Site Assessment: Understanding both the origin and destination sites is vital.
-
Detailed Moving Plan: Every step of the relocation should be documented.
-
Equipment and Personnel: The right equipment and a skilled team are essential.
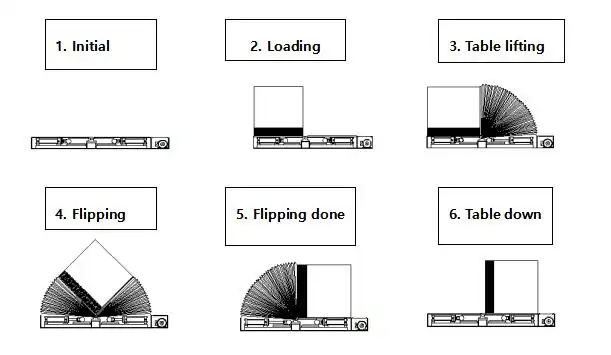
Deconstructing the Relocation Process: A Step-by-Step Guide
To provide a more structured approach, let's break down the relocation process into manageable phases. Each phase requires careful consideration to mitigate potential issues.
Phase 1: Initial Assessment and Planning
This phase sets the foundation for the entire relocation. Overlooking details here can lead to significant problems later.
| Task | Description | Considerations |
|---|---|---|
| Evaluate Current Site | Assess the existing location of the mold upender. | Space constraints, accessibility, floor load capacity, and potential obstructions. |
| Evaluate Destination Site | Analyze the new location for suitability. | Dimensions, floor strength, proximity to power sources, and workflow integration. |
| Develop a Detailed Plan | Create a step-by-step relocation plan. | Include timelines, assigned responsibilities, equipment lists, safety protocols, and contingency plans. |
| Permitting and Compliance | Ensure all necessary permits are obtained. | Comply with local, state, and federal regulations, including safety and environmental standards. |
| Risk Assessment | Identify potential risks and hazards. | Conduct a thorough risk assessment to address equipment failure, personnel injury, structural damage, and logistical delays. |
Phase 2: Preparing the Mold Upender for Transport
Proper preparation minimizes the risk of damage during the move.
| Task | Description | Considerations |
|---|---|---|
| Disconnect Power | Safely disconnect all electrical and hydraulic connections. | Follow lockout/tagout procedures to prevent accidental energization during the move. |
| Secure Moving Parts | Secure all moving components to prevent shifting. | Use straps, braces, and padding to stabilize parts and protect them from damage. |
| Drain Fluids | Drain all hydraulic fluids and oils. | Properly dispose of fluids according to environmental regulations. |
| Protect Sensitive Areas | Wrap and protect sensitive areas, such as control panels. | Use protective coverings, such as bubble wrap or moving blankets, to shield from scratches and impacts. |
Phase 3: Executing the Relocation
This phase involves the physical movement of the mold upender.
| Task | Description | Considerations |
|---|---|---|
| Lifting and Loading | Use appropriate lifting equipment to load the mold upender onto transport. | Ensure the lifting gear is rated for the weight, and the team is trained in safe lifting practices. |
| Securing the Load | Secure the mold upender to the transport vehicle. | Use chains, straps, and tie-downs to prevent movement during transit. |
| Transportation | Transport the mold upender to the new location. | Plan the route, accounting for road restrictions, bridge clearances, and traffic conditions. |
| Unloading and Positioning | Carefully unload and position the mold upender in the new location. | Use the same lifting equipment and techniques employed during loading. |
Phase 4: Final Setup and Testing
The final phase ensures the mold upender is operational and safe.
| Task | Description | Considerations |
|---|---|---|
| Reconnecting Utilities | Reconnect all electrical and hydraulic connections. | Verify all connections are secure and comply with safety standards. |
| Leveling and Calibration | Level the mold upender and calibrate its systems. | Use precision instruments to ensure accurate and reliable performance. |
| Safety Checks | Perform thorough safety checks. | Verify all safety devices, guards, and interlocks are functioning correctly. |
| Operational Testing | Conduct operational testing to confirm proper function. | Run the mold upender through its full range of motions and load capacities to identify any issues. |
By following these steps, you can minimize risk and ensure a successful mold upender relocation.
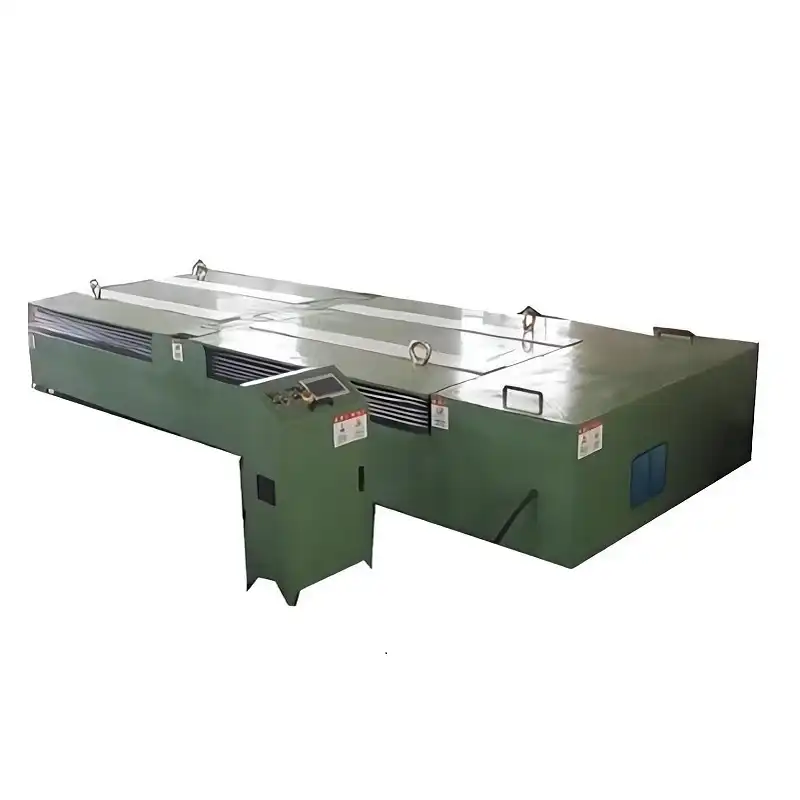
Choosing the Right Equipment for Moving a Mold Upender
Selecting the appropriate equipment is vital for a safe and efficient relocation. Different mold upenders have varying weight capacities and dimensions, requiring specific tools to handle them properly.
Selecting the correct equipment is paramount when moving a mold upender. Using inadequate or inappropriate equipment can lead to accidents, damage, and delays. Ensure all equipment is rated for the job and in good working condition.
Consider these factors when selecting equipment:
- Lifting Capacity: Ensure all lifting equipment meets or exceeds the weight of the mold upender.
- Reach and Maneuverability: The equipment must be able to reach the mold upender and maneuver it through tight spaces.
- Safety Features: Prioritize equipment with safety features such as overload protection.
Analyzing Lifting Options: Cranes vs. Forklifts
Choosing between cranes and forklifts can be complex. Both have advantages and disadvantages depending on your specific needs. Let's break down the comparison:
Cranes: The Heavy-Duty Option
Cranes are typically used for very heavy loads and offer excellent vertical lift capabilities.
- Pros: High lifting capacity, excellent vertical reach, and precise control.
-
Cons: Require significant setup time, may need specialized operators, and can be costly.
Forklifts: Versatility and Maneuverability
Forklifts offer greater maneuverability and are suitable for tighter spaces, but have limited lifting capacity.
- Pros: High maneuverability, relatively quick setup, and more cost-effective for lighter loads.
- Cons: Limited lifting capacity, may require additional equipment for stabilization, and less vertical reach.
Making the Right Choice: Key Considerations
Ultimately, the decision depends on your specific situation.
- Weight and Dimensions: Heavier and larger mold upenders typically require cranes, while lighter and more compact units may be handled by forklifts.
- Space Constraints: Cranes require more overhead clearance and operating space, while forklifts can maneuver in tighter areas.
- Budget: Crane rentals and specialized operators can be more expensive than forklifts.
To further illustrate the decision-making process, consider the following scenario:
Imagine you need to relocate a mold upender weighing 8,000 lbs within a warehouse with low ceilings and narrow aisles.
- Crane Assessment: A crane may not be feasible due to space constraints and overhead clearance.
- Forklift Evaluation: A heavy-duty forklift with a 10,000 lbs capacity and appropriate rigging would be a better choice.
- Safety Measures: Ensure the forklift operator is certified, and outriggers are used for added stability.
By carefully evaluating your options and considering all relevant factors, you can choose the best equipment for your specific needs.
Securing and Stabilizing the Mold Upender for Safe Transport
Properly securing and stabilizing the mold upender during transport is essential to prevent accidents and damage.
Securing the load is non-negotiable. Failing to properly secure the mold upender can lead to catastrophic consequences, including equipment damage, personnel injury, and delays. Use appropriate tie-downs and follow established safety protocols.
Consider these best practices for securing your load:
- Use Appropriate Tie-Downs: Chains, straps, and binders should be selected based on the weight and size of the mold upender.
- Distribute Weight Evenly: Ensure the load is evenly distributed on the transport vehicle to maintain balance.
- Regular Inspections: Check tie-downs frequently during transit to ensure they remain secure.

- Understanding Load Securement Techniques
Different load securement methods offer varying levels of protection. It's crucial to select the technique that best fits your specific needs.
Direct Tie-Downs: The Foundation of Security
Direct tie-downs involve connecting the mold upender directly to the transport vehicle using chains, straps, or ropes.
- Chains: Provide high strength and durability, suitable for extremely heavy loads.
- Straps: Offer flexibility and ease of use, ideal for securing sensitive components.
- Ropes: Best used for lighter loads and temporary securement.
Blocking and Bracing: Preventing Movement
Blocking and bracing use physical barriers to prevent the mold upender from shifting during transport.
- Wooden Blocks: Ideal for filling gaps and preventing lateral movement.
- Steel Braces: Provide robust support against tipping and sliding.
- Custom Fixtures: Fabricated to fit specific mold upender designs for added security.
Combination Methods: The Ultimate Approach
Combining direct tie-downs with blocking and bracing provides the most comprehensive securement solution.
- Primary Securement: Use direct tie-downs to secure the mold upender to the transport vehicle.
- Secondary Support: Employ blocking and bracing to prevent shifting and tipping.
- Regular Checks: Inspect tie-downs and bracing at regular intervals to ensure they remain effective.
Effective load securement involves a combination of proper techniques, appropriate equipment, and diligent monitoring.
Minimizing Downtime During Mold Upender Installation
Minimizing downtime is a key goal during any relocation project. Every hour of lost production can translate into significant financial losses.
Downtime is costly. By focusing on pre-planning, efficient processes, and rapid issue resolution, you can minimize disruptions and get back to full production as quickly as possible.
Consider these strategies for minimizing downtime:
- Prioritize Pre-Installation Preparation: Preparing the new location before the mold upender arrives can save significant time.
- Streamline the Installation Process: Workflows should be optimized for efficiency and speed.
- Address Issues Rapidly: A responsive team can quickly resolve problems and prevent delays.
Here’s a plan to minimize downtime:
Optimizing the Installation Process: A Phased Approach
A phased approach to installation can significantly reduce downtime. Let's examine each phase and its potential impact.
Phase 1: Pre-Arrival Preparation
This phase involves preparing the new location before the mold upender arrives.
| Task | Description | Potential Downtime Reduction |
|---|---|---|
| Clearance and Setup | Prepare the site by removing obstacles and setting up utilities. | Reduces on-site prep time by 20-30% |
| Foundation Check | Inspect and reinforce the foundation. | Prevents structural issues and costly repairs |
| Equipment Staging | Stage essential tools and equipment near the site. | Minimizes delays due to searching for tools |
Phase 2: Efficient Unloading and Positioning
Quick and accurate unloading and positioning are crucial.
| Task | Description | Potential Downtime Reduction |
|---|---|---|
| Strategic Unloading | Plan the unloading process to minimize movement. | Reduces unloading time by 15-20% |
| Precise Positioning | Use laser alignment and level measurements for accurate placement. | Ensures proper function and reduces rework |
Phase 3: Rapid Utility Connections and Calibration
Swiftly reconnecting utilities and calibrating systems is essential for a quick restart.
| Task | Description | Potential Downtime Reduction |
|---|---|---|
| Organized Connections | Pre-label cables and connections for easy reconnection. | Reduces reconnection time by 25-35% |
| Swift Calibration | Use calibrated tools and follow a checklist for calibration. | Prevents inaccurate operation and rework |
Phase 4: Verification and Issue Resolution
Thorough testing and a responsive team are vital for addressing any unexpected problems.
| Task | Description | Potential Downtime Reduction |
|---|---|---|
| Thorough Testing | Run all systems and functions to identify issues. | Prevents future breakdowns and ensures optimal performance. |
| Skilled Team | Maintain an experienced team ready to troubleshoot problems. | Resolves issues quickly and prevents further delays. |
By focusing on a phased approach and implementing these strategies, you can significantly reduce downtime and ensure a quick return to full production.
Prioritizing Safety During Mold Upender Relocation
Every aspect of the relocation process should prioritize safety to protect your team and equipment.
Safety is paramount. Implementing strict safety protocols and ensuring all team members are properly trained will minimize the risk of accidents and injuries. Don't compromise safety for speed.
Consider these essential safety measures:
- Comprehensive Training: All team members must be trained on the safe operation of relocation equipment.
- Clear Communication: Effective communication ensures everyone is aware of potential hazards and procedures.
- Personal Protective Equipment (PPE): All personnel should wear appropriate PPE, including hard hats, safety glasses, and gloves.
Effective planning, training, and strict adherence to safety protocols are essential for a safe and successful relocation. Don't overlook any aspect of safety.
This article provided best practices for [mold upender relocation].